Quick Start#
Activating Layers#
To be able to start working with Weight Layers, you need a mesh with an armature modifier already added.
You can enable weight layers by clicking on the Enable Layers button.
Layers#
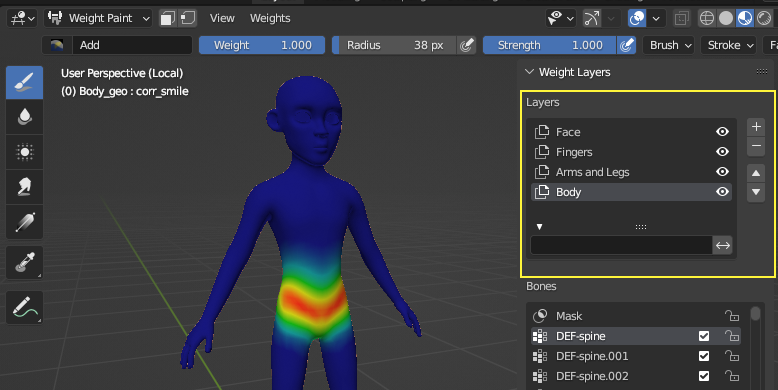
Layers are main feature of the the addon. Layers allow you to divide weights to easier manageable parts and blend them together with layer masks. In this panel, you can navigate between layers and paint the weights for the selected layer. Double clicking on the layer name will allow you to rename the layer.

You can add a new layers by clicking on the + button. From the dropdown menu, you can choose to add an empty layer, add a layer with automatic weights, or duplicate the current layer. You can also remove a layer by clicking on the - button. Arrow buttons will allow you to move the layers up and down.
Empty Layer: Adds a new empty layer with no weights assigned to any bone. You can paint the weights as you want for the layer.
Auto Weights: Adds a new layer with automatic weights. This will assign vertices to closest bone based on distance.
Duplicate Layer: Duplicates the current layer. This will copy the weights from the current layer to the new layer.
Bones#
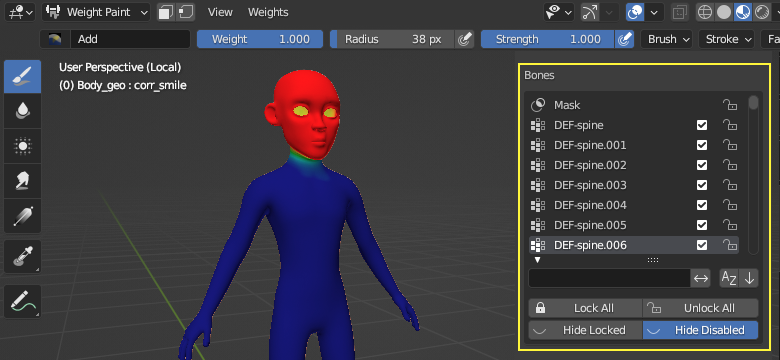
Bones panel is almost same as the blender’s vertex groups panel. It allows you to select different bones and paint the weights for the selected bone.

In addition to that, each layer has its own Mask group at the top. You can enable / disable and lock / unlock the influences. With filtering options below, you can easily filter and select the bones that you want to work with.
Mask: Masking will allow you to paint influence areas for each layer. So you can blend layers together as you want. For example, you can paint mask for the face so bone influences in the face layer will only affect painted area.
Enable / Disable Bone: Enabling / Disabling the bone will allow you to choose the bones that you need for the current mesh. This will exlude the disabled bones from vertex groups of the mesh. You’ll have a cleaner view of the bones and gain performance while working with the mesh.
Lock / Unlock Bone: Locking / Unlocking will allow you to lock / unlock the weights for the bone. Locking a bone prevents unintended changes to the weights, while unlocking allows you to apply operations to specific bones.
Tools#
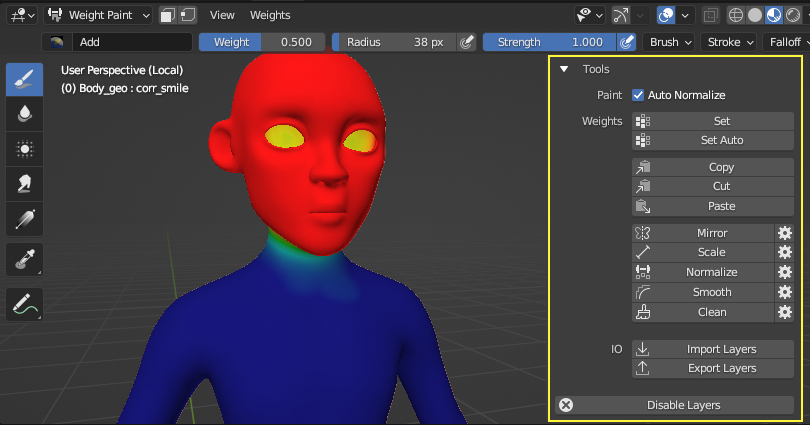
Tool panel has some additional operations for helping to weight paint process.

Paint#
Auto Normalize: Normalize the weights in the current layer while painting. It ensures that the total bone weights for each vertex add up to 1.0, preventing deform issues caused by weights exceeding 1.0.
Weights#
Set: Set the weights to the value that you set in the brush Weight field. If vertex selection mode is active, it will set the weights for the selected vertices.
Set Auto: Assign each vertex to the closest bone based on distance. If vertex selection mode is active, it will assign the selected vertices to the closest bone.
Copy: Copy the weights from the active bone to the clipboard. If vertex selection mode is active, it will copy the weights for the selected vertices.
Cut: Cut the weights from the active bone and copy them to the clipboard. If vertex selection mode is active, it will cut the weights for the selected vertices.
Paste: Paste the weights from the clipboard to the active bone. If vertex selection mode is active, it will paste the weights for the selected vertices.
Mirror: Mirror the weights one side to the other side.
- Mirror Direction:
Right to Left: Mirrors the weights from -X to +X.
Left to Right: Mirrors the weights from +X to -X.
Scale: Scale the bone weights proportionally by the scale factor. If vertex selection mode is active, it will scale the weights for the selected vertices.
Scale factor: The scale factor to apply to the weights. It it is less than 1.0, it will reduce the weights. If it is greater than 1.0, it will increase the weights.
Normalize: Normalize the weights for the active layer.
Lock Active Bone: If enabled, it will lock the active bone weights while normalizing and normalize the other bone weights.
Smooth: Smooth the weights for the active bone. If vertex selection mode is active, it will smooth the weights for the selected vertices.
- Smooth Group:
Active Group: Smooths the weights for the active bone only.
All Groups: Smooths the weights for all bones.
Smooth Factor: Strength of the smoothing. It is a value between 0.0 and 1.0. If it is 0.0, it will not smooth the weights. If it is 1.0, it will smooth the weights completely.
Smooth Iterations: Number of iterations to apply the smoothing. It is an integer value. If it is 0, it will not smooth the weights. If it is greater than 0, it will smooth the weights for the given number of iterations.
Smooth Distance: Expand or shrink the smoothing area. It is a value between -1.0 and 1.0. If it is -1.0, it will shrink the smoothing area. If it is 1.0, it will expand smoothing area.
Clean: Remove the weights under the threshold value. If vertex selection mode is active, it will remove the weights for the selected vertices.
- Clean Group:
Active Group: Clean the weights for the active bone only.
All Groups: Clean the weights for all bones.
Limit: The threshold value to remove the weights. If the weight is less than the threshold, it will be removed.
IO#
Import Layers: Import the layers from the json file.
- Import Method:
Auto: Automatically chooses the best method for the imported mesh.
Vertex Index: Matches and imports weights based on vertex IDs. Source and target meshes must be identical.
Closest Vertex: Imports weights based on the closest vertex. Works best transferring weights from hi to low density mesh.
Closest Point: Imports weights by calculating projected point on the closest triangle. Works best transferring weights from low to hi density mesh.
- Import Options:
Add: Adds the imported layers to top of the existing layers.
Replace: Replaces the existing layers with the imported layers.
Export Layers: Export the layers to the json file.
Disable Layers#
This will bake all layers to vertex groups and remove the weights layers from the rig. Once you finish the weight painting process, it’s recommended to disable the layers to save the file size and performance before delivering the final rig.
Warning

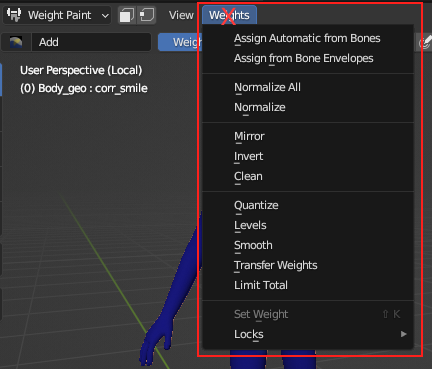
Built-in weight Operations are not compatible with the weight layers. Always use the operations from the Weight Layers tool panel instead.